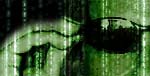
 Matrix meets Spirit (the mascot of the company I work for) – that was the idea for the title picture of the latest newsletter and so I kickstarted poser and photoshop …
Well, that’s the picture I made for the newsletter of my company
and if you read on, there is a mini_tutorial …
Little note: the bold written words are the commands in photoshop
in english – german
 |
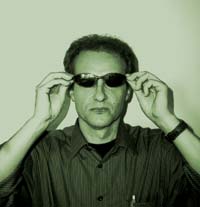
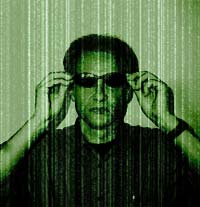
The Photo
The original picture shot with a digital camera. In Photoshop I adjusted |
 |
A green person
I duplicated the layer (so I got the original if something doesn’t turn |
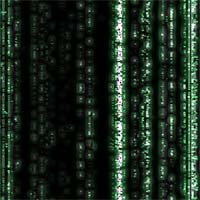 |
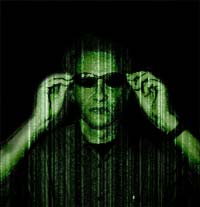
The Matrix effect
I found a really cool tutorial at In short it’s a three-way-thing. Start with a white layer and
|
 |
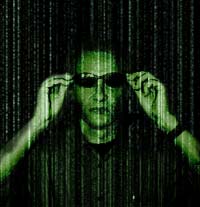
Combine it
Now you have 2 layers: the green person & the matrix effect. Put |
 |
Mask it
Now I added a black layer and I deleted the parts where the person should |
 |
Some more Matrix’ing
On the black layer from the last job (Mask it) I added another Matrix.effect Now it was time for Spirit … |
 |
Photoshooting with Spirit
I started the virtual portrait-camera (aka Curious Labs Poser), asked |
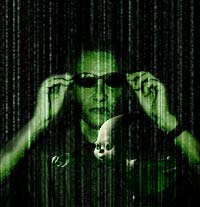 |
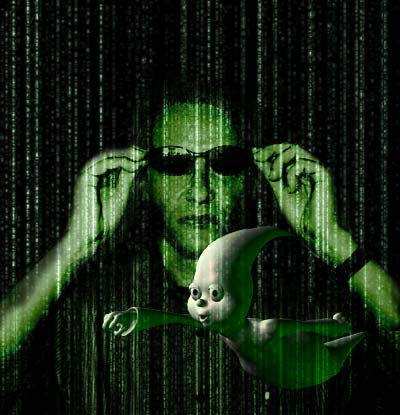
Bringing it together
In Photoshop I imported the picture of Spirit and duplicated the layer. The final order of the layers is (top to bottom): – black mask with matrix.effect – first Spirit.photo where I erased some parts of the Spirit’s back – matrix.effect – second Spirit.photo – green person |
That’s it – hope you like it and don’t forget to visit my friend
Spirit at www.forschergeist.at