After reading the brilliant book „After Effects in Production“ I was curious to see if I can produce a clip similar to the one in the book with my home equipment: a miniDV camcorder and AfterEffects …. At that time I had all the video clips for my next DVD except the menu. So I thought here is a good opportunity to combine these two steps.
Well, enough introduction. Here is a frame from the final menu plus the video itself:
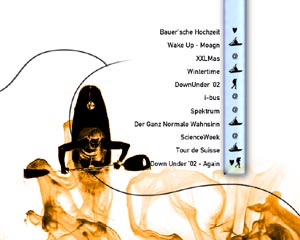 |
In the video we got a few different areas: ok, here is the download for the finished |
1. Getting the background animations
I hope you saw the video, so you know what the orange things looks like. They were quite easy to produce:
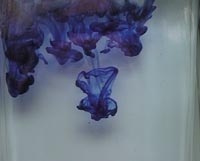 |
That’s the original footage. I used a simple glass vase, poured water in it, put my camera on a tripod and pointed it at the water. While recording I injected blue ink into the water. After that it was time to capture the videos (using StudioDV in my case). Next followed the import into After Effects and I made a composition for the background. |
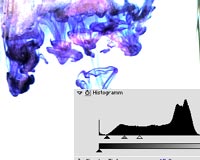 |
The next step was to get a clean background – easy with Effekt/Anpassen/Tonwertkorrektur. The easiest way to do this is to change the bracketing of the histogramm. As you can see I got a clean white background. Next step: get rid of the color information (I used Farbbalance (HLS) So I got the grey raw material that could be colored to my personal liking. |
2. The silouttes
Now came the real work … I wanted to show some of my hobbies in a b/w style….
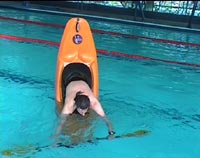 |
The toughest of the videos was this sequence and the boogieboard one. The snowboard sequences where rather easy due to simple keying with the snow. All the footage was again shot with my DV camera, then captured and imported into AfterEffects. For each sequence I had a separate composition in AfterEffects |
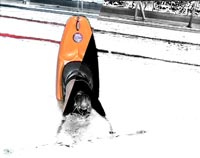 |
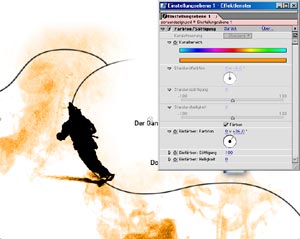
After playing with different keying options I used Effekte/Keying/Farbbereich, where I used the RGB mode and parameters that gave me the best key – except the red lines … (left version of the pix) To get a B/W version of it I defined Effekte/Anpassen/Schwellenwert with |
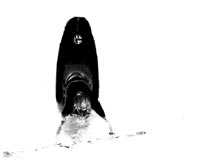 |
Now came the tough job – Vectorpaint !!! The kayak sequence was the longest one with a duration of 8 seconds@25 frames per second … Using my Wacom tablet I had to clean the footage for 8×25=200 frames … nice evening job :) Vectorpaint is really very useful for such manual keyings but |
3. Bringing it together
 |
Ok, so I got 2 different backgrounds and 4 B/W sportclips. Now it was time for the final composition. I rotated the backgrounds and defined a mask for the background similar to the wavelike line. I put all the sport clips (in this picture it’s Harry on his snowboard) above. Until now everything was black and white, but thanks to the Adjustment The last step was to put the blue bar with the icons and the text (a |
4. Missing things and rendering
…. after I came back from the trip, I just wanted to finish the menu …
three hours of raw material from the trip is (still) waiting. So I didn’t continue
with some improvements (better integration, some animated gimicks, etc), but
just started the rendering (uncompressed, optimised quality). Thanks to the
new MPEG Encoder in Premiere 6.5 the 2-pass encoding with variable bitrate was
just a short thing and I could import the file in DVD Studio Pro and finish
my DVD#2 project
Grafix for www.mosabuam.com
At the same time Manfred did all the setup for our homepage and
I started with the grafix.

I used the background renderings from the video, a simple text overlay with
the lines above and underneath it plus a picture that was typical for the topic.
The picture became a siloutte again and I had the topic buttons – simple ….
The other thing we needed were the grafix for the top area of
the page:

The left thing is supersimple: two different colorised background images with
a Multiply effect ….
The right image is also simple: again a background image plus different pictures (did
you notice the random selection of the pictures at the top of the page) that
are colorised and in a quick’n’dirty way integrated with the background – I
just used parts of the pictures with a feathered brush … that’s it
hope you got some ideas – if I can help you just write a comment
or email me